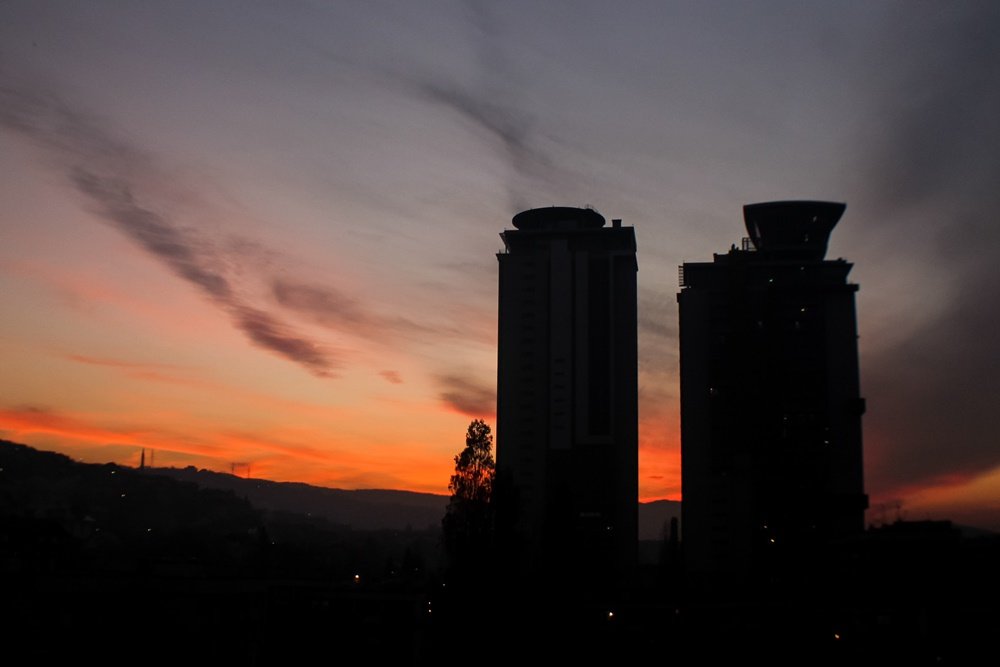

Have you wondered how to properly photography silhouettes? Silhouettes are a wonderful way to convey drama, mystery, emotion and mood to the viewers of your photos and often stand out in an album because of the combination of their simplicity but also the story that they convey. Silhouettes don’t give the viewer a clear picture of everything but leave part of the image up to their imagination to wonder about.
The basic strategy for photographing a silhouette includes placing your subject in front of some source of light and to force your camera to set its exposure based upon the brightest part of your picture and not the subject of your image. By doing this, your subject will be under exposed (very dark or completely black).
There are a lot of very technical descriptions going around on how to take great silhouette shots that you might want to look up. Most of the time, when you are outdoors on a sunny day, making a silhouette photograph won’t be a problem. What you just need to do is to turn your camera towards the sun directly or in a certain angle (depending on what kind of frame you want) to get a bright background and place the subject in front of this background. You will see how your subject becomes dark. You can play with the aperture and the ISO to get brighter or completely black silhouette. It’s up to your taste.
If you are photographing silhouettes with studio lights or artificial light, then you will want to be sure that your background is lit more than your subject by several stops. For example, if a proper exposure on your subject would be f/4, but your background meters at f/16 (a difference of four stops) then it’s likely that you will underexpose and darken your subject to create a silhouette (so long as you set your camera to f/16).
To set your camera properly for silhouettes, you want to meter for the background. This will involve an understanding of your camera and metering modes, as well as camera functions such as AE lock and exposure compensation. To help get you started, here are some of the metering modes you can use, some you should avoid and also a workarounds to an exposure that may not be working out for you:
- Evaluative or Matrix Metering
This is the “standard” metering mode for most cameras and may work perfectly for your silhouette. This mode averages the exposure for your entire scene, so if the background is the largest portion of your scene, then you’ll probably be okay with using this metering mode on your silhouette. If a large part of your image is your subject and/or foreground, then you may end up with an overexposed silhouette.
- Partial and/or Center Weighted Metering
This will weigh the metering of your scene in the center of your viewfinder and expose for that area. It can be a good metering mode to use if your subject is off-center and the sky is the most prominent portion of the center of your scene. However if your subject is in the center of your frame then it might not be the best for a silhouette.
- Spot Metering
Spot metering can be great choice for silhouettes if you know how to use it. This metering mode will pull a very small portion of the frame either from the very center of the viewfinder, or from your focus point and meter from that spot. If this spot is sitting over your subject, then you will not end up with a silhouette but rather a very blown-out background. If you know how to use your AE lock button (“Autoexposure” Lock), which is typically the little button with the asterisks on it near your right thumb when holding a DSLR, then that is an excellent way to ensure a good silhouette exposure. Just put the spot over your sky/background, press the AE lock button once and then focus and recompose your scene. You will likely have to re-lock the exposure for each frame, and it is also a good idea to refer to your camera manual to find out more about this feature specific to your camera model.
Tuts and Reviews is a photography & filmmaking resource site. We find and feature freebies that we have found around the web from trusted sites and photographers as well as video or film creators. Make sure to browse our listing in the Freebies section! We also create our own digital products (free & paid) which you can check in our shop.