Are you a complete beginner when it comes to real estate photography? You’ve come to the right place. We have tips from real estate and photography professionals who’ll give you great beginner advice on taking photos that sell homes. Let’s get started!
Invest in a wide angle camera lens to emphasize space and create a sense of depth.
Tip #1: Always use a wide angle camera lense to capture the full essence of a space. This allows for a wider shot which gives a true sense of both depth and detail.
Tip #2: HDR photography allows you to stand out from the crowd. HDR takes several exposures of the same photo and combines them giving you professional photographs that look rich and full of dynamic shades. When potential buyers are looking at photos online, HDR leaves a memorable note due to its unique a polished look.
Analyze Great Real Estate Photographs to See Why They Work
One of the best ways to learn how to master real estate photography is to analyze great pictures to see why they work.
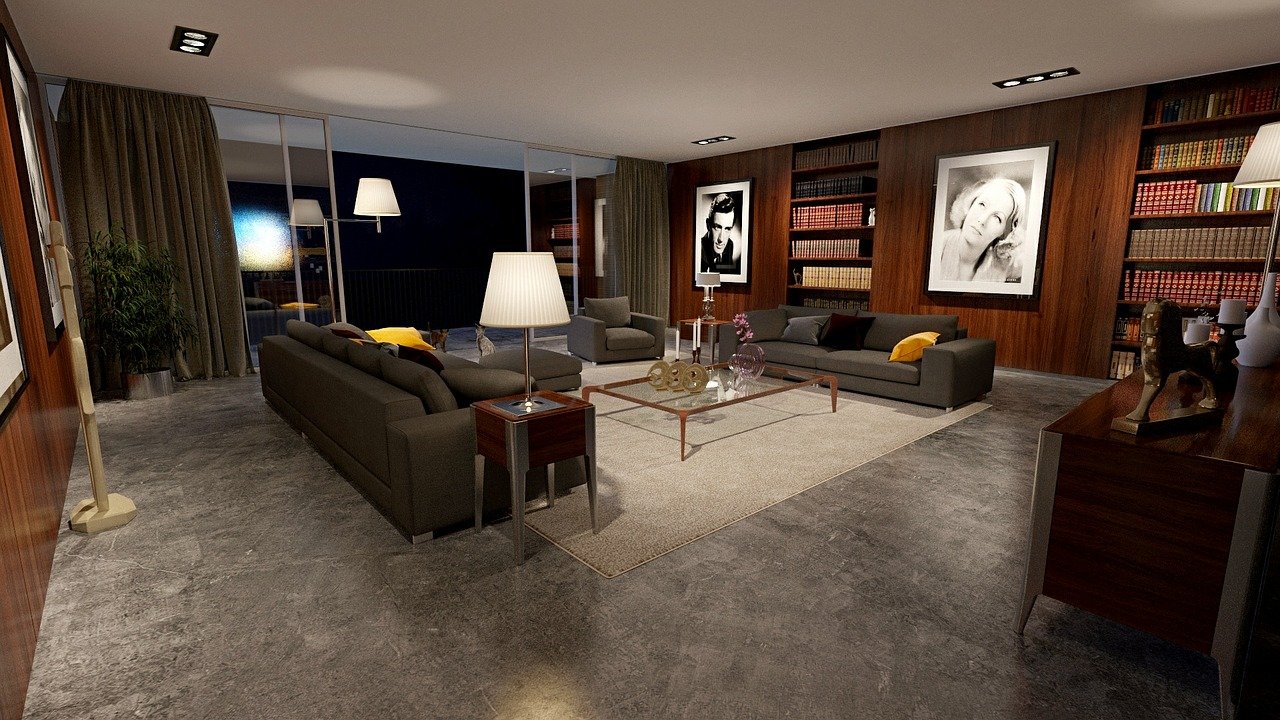
Compose Your Pictures to Emphasize Space and Natural Light
Space and natural light are two qualities that home buyers are always looking for. Keep space and natural light in mind when composing your pictures.
If You’re Shopping for a New Camera, Forget Megapixels and Buy a Full Frame Camera
Sensor size, not megapixels, is the most important criteria to consider when purchasing a new digital camera. Generally speaking, larger sensors mean better image quality, better low light performance, but more importantly, a wider field of view, which allows you to capture more of the room in your picture.
Emphasize the best feature in each room.
Our top tip for real estate photography would be to take a photo that emphasizes each room’s selling point, whether it is the natural light in the room, the spaciousness, or the little nook in the corner that will make buyers curious to see more.
Prepare Every Room You Plan to Shoot
You can check this room-by-room guide (How to Prepare Your Property for Real Estate Photography) that explainsyou how to prepare each for your photo shoot.
Pay attention to distortion that often happens when taking photos
Sometimes lenses added distortion to vertical lines in your photographs making them appear to converge at the top of the picture.. This is called the “keystone effect”. Luckily this can be fixed in photoshop.
Avoid using fisheye or other tricks instead of a wide angle lens
There is a trend right now in real estate photography to shoot homes with poor quality fisheye lenses. Not only does this look ridiculous, but it’s deceiving to the potential buyer. Making a space look larger than it is by using a lens that distorts the area is not going to increase a buyer’s interest. They are going to arrive expecting a mansion and viewing a shack. Honest photos which exemplify the space are best.
Knowing The Proper Angles To Take Photos Means Everything
The angle at which you are showcasing the various rooms in a home is extremely important. For example, if you’re looking to show off some high end cabinetry in a home, you want to take a shot of the cabinets from an angle that will show not only the depth of the cabinets but also the quality of the cabinets.
If you’re new to taking real estate photos, the best way to learn what angles will showcase your listings best is by practicing and making sure also that you take lots of photos. You can always delete bad photos but you cannot select a photo if you haven’t taken it. Take photos of each room from almost every angle that is possible.
Tuts and Reviews is a photography & filmmaking resource site. We find and feature freebies from around the web provided by trusted sites and photographers as well as video or film creators. Make sure to browse our listing in the Freebies section! We also create our own digital products (free & paid) which you can check in our shop. Follow us on Facebook.